6. Create Your First Level
A guided hands-on walkthrough to manually paint shelves, place items, test triplet balance, and verify solvability.
Use the Visual Designer and palette screenshots in Section 5 while following these steps.
A small manual level
-
01
Step 1
Stop Play Mode and open the Level Editor.
-
01
Click + New Level
The tool creates a starting layout; it is not an empty scene.
-
01
Step 1
Keep the new level number so you do not replace an existing level.
-
01
Choose Distribution Mode: Manual
-
01
Step 1
For a simple test, make a layout with three shelves and three active slots per shelf. Remove extra rows or
columns if needed.
-
01
Step 1
Set Depth Per Slot to 1 and choose Layer 0 (Front).
-
01
Clear any items you do not want to keep
-
01
Choose one item, such as an apple
Place one apple in each shelf's first slot.
-
01
Choose another item, such as a banana
Place one banana in each shelf's second slot.
-
01
Leave each shelf's third slot empty
-
01
Set Time Limit to 90
-
01
Step 1
Use the balance matrix: you should have 3 apples and 3 bananas, with space to move them.
-
01
Step 1
Click Re-Check, then Simulate & Verify.
-
01
Click Save Prefab
-
01
Step 1
Click Playtest and complete the level.
Where is it saved?
The editor saves the level in Assets/Prefabs/Levels and updates Assets/Data/Levels Database/LevelDatabase.asset.
You do not need a separate Unity scene for each level. The game loads level prefabs from its database.
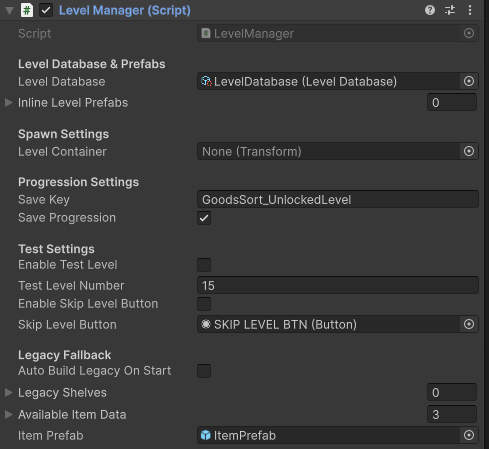
Test a specific level from the main scene
Select the game manager and find Level Manager. Turn on Enable Test Level, enter its Test Level Number, and press Play. Turn test mode off when you finish.